Hoppa till innehåll

Etikett: Ubuntu

Recover files from old system LUKS drive

So a few weeks ago – at my very first lecture for this semester – my precious laptop (Sony Vaio Pro 13) gave in. I was rather upset, I must admit. However I actually got myself another one – with twice as much RAM and disk space (pretending it’s the same, altough I love new tech).
Now, the Vaio Pro 13 uses M.2 SSD disks, so backing up the old drive, which I of course kept, needed a M.2 to SATA adapter. Also I already got a SATA to USB. And although I have rather sophisticated backup routine for my machines, there are still things that there, on the old system, that I want – like PPAs, config files and what not (I really need to start backing them up as well). Of course one could to a complete restoration of the system, but I do very much like to combine a backup restore with the feeling of a freshly installed system, hence I recover only what I want.
20160924_131529
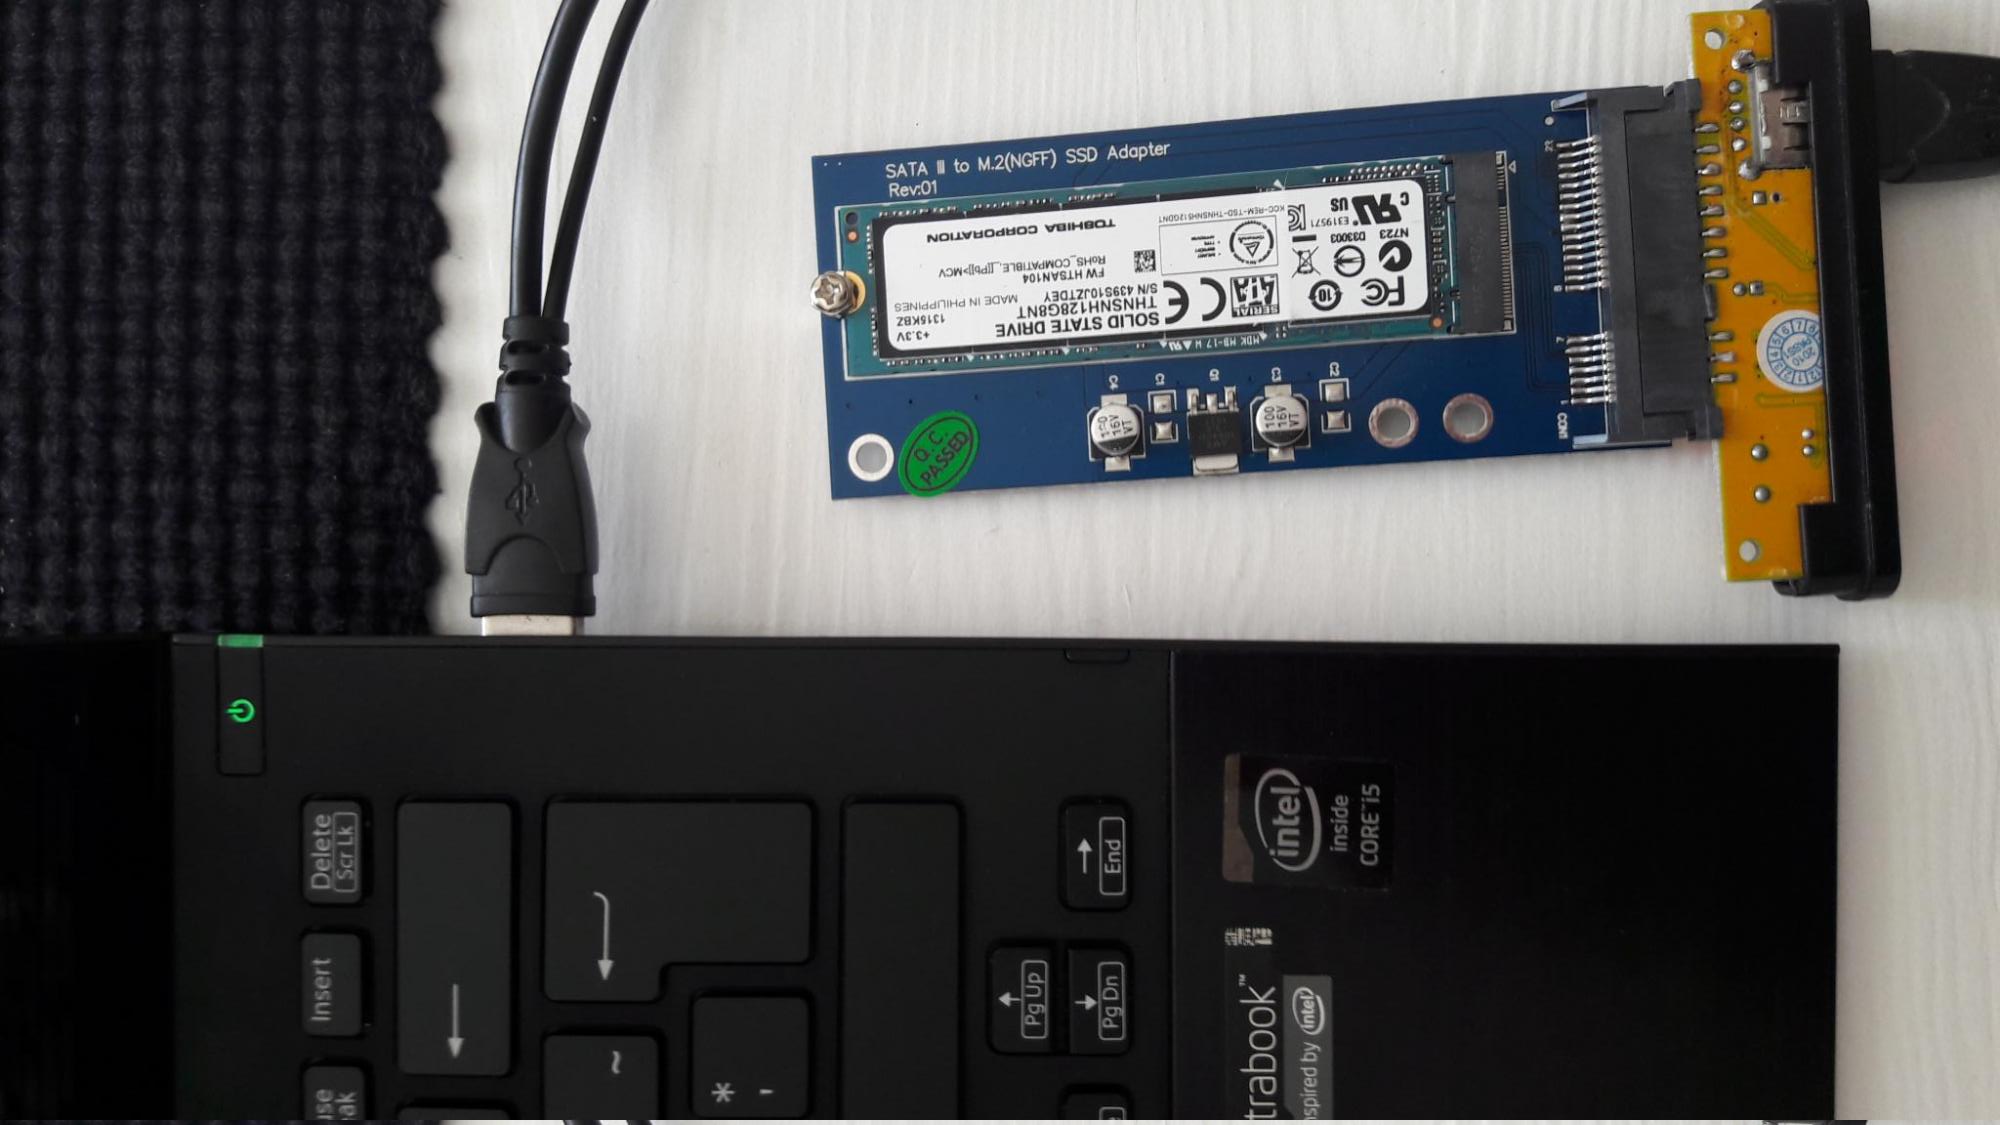
I plugged everything in. I’m using LUKS on all machines for better security so the passphrase promt showed up much to my appreciation, but. Error. Of course my heart rate rised. Trying a few times more; trying the disk utilty; on other computers; again in the new one. No change. Pop up the terminal to run the commands manual (I knew that it was /dev/sdb5 from error and disk utility):

$ sudo cryptsetup luksOpen /dev/sdb5 encrypt_oldhome
$ mkdir oldhome
$ sudo mount /dev/mapper/encrypt_oldhome oldhome/
mount: unknown filesystem type ’LVM2_member’

And I though: ”What is this?”. I have the lvm2 package installed. Searching and found that it is due to the LVM groups of the old and new system having the very same name, which created the issue.[1]
So, of course one has to change that, but how? Well, using vgrename.[2]
Once again, in terminal, you run:

$ sudo vgdisplay

Here you locate the old LVM – and do be very sure about this so that you accidentally don’t rename the volume of currently running system. I made sure of this by looking at the size of the drives; my old one was 128GB and new is 256GB. Once located, you copy the ”VG UUID” and run this command:

$ sudo vgrename YOUR-VG-UUID ubuntu-vg-old

(”ubuntu-vg-old” is the new name, which the suffix ”old” is added from prevous ”ubuntu-vg”, which is Ubuntu’s default)
Now you are once again able to mount the old system by re-running the mount command, now without error:

$ sudo mount /dev/mapper/encrypt_oldhome oldhome/

So, in conclusion, the issue was that the new and old system’s volume group (LVM) had the same name. Solution was to change the name of the old drive’s LVM.
 
1: https://askubuntu.com/a/766141
2: http://www.cyberciti.biz/faq/warning-duplicate-vg-name-server01-error/

Kommentarer är stängda

Dagens kommando: apt-cacher


Igår släpptes Ubuntu 16.04 LTS Xenial Xerus[0][1] och givetvis vad det dags för uppgradering. Då jag har flera maskiner som ska uppdateras så tänkte jag spara lite på bandbredden – dels för att minska påverkan på officiella spegelservrar men dels för att det är kul och att jag kan. Min laptop, min flickväns, min mors laptop (som har hängt med utan ominstallation sedan 11.10, vilket bara det är imponerande), farmor och farfars, mfl. står inför uppgradering av Ubuntu eftersom 16.04 är en LTS och verkar vara en riktigt bra sådan. Uppgraderingen hat gått bra – bättre än någonsin, skulle jag säga, och min laptop fungerade precis likadant som innan (bortsett från ownCloud-klienten vars indikator inte syns ännu, men det kommer antaligen att fixas snart). Det är en go Ubuntu-utgåva helt enkelt. Men det är inte det som jag ska tala om, utan hänvisar istället vidare för goa saker att göra efter installation[2] samt vad som är nytt[3][4].
Nej, istället tänkte jag tipsa om hur du, ifall du har flera maskiner att uppdatera, kan sätta upp en egen spegel (eller cache) så att du endast behöver ladda ner paketen en gång (från officiell spegelserver, alltså). Det hela är väldigt enkelt och du är klar på en kvart.
Vad du behöver är en maskin (alltså dator med Ubuntu – helst, men andra Debian-derivat eller Linuxdistar fungerar givetvis också, men med andra instruktioner för installation) som ska agera paketcache och sedan en eller flera andra maskiner att uppgradera. Jag kommer nedan att benämna denna maskin som server för enkelhetens skull och ”klient” till de som ska uppgraderas.

Server

  1. Installera paketet apt-cacher samt webservern apache2
    sudo apt-get install apt-cacher apache2
  2. Aktivera apt-cacher genom att redigera filen /etc/default/apt-cacher och ändra så att det står ”AUTOSTART=1” (utan citationstecken)
  3. Starta om Apache:
    sudo service apache2 restart
  4. Redigera nu filen /etc/apt-cacher/apt-cacher.conf och se till att du har aktiverat:
    allowed_hosts = * (om du nu vill att alla ska kunna använda servern som cache)
    distinct_namespaces = 1 (för att cacha paket för alla Ubuntu-utgåvor)

    Och, kanske viktigast, för att tillåta uppgradering av senare Ubuntu-utgåvor behöver du lägga till denna rad (en modifiering av orginal regexp) [5]:

    installer_files_regexp = ^(?:vmlinuz|linux|initrd\.gz|changelog|NEWS.Debian|[a-z]+\.tar\.gz(?:\.gpg)?|UBUNTU_RELEASE_NAMES\.tar\.gz(?:\.gpg)?|(?:Devel|EOL)?ReleaseAnnouncement(?:\.html)?|meta-release(?:-lts)?(?:-(?:development|proposed))?)$
  5. Starta nu om apt-cacher:
    sudo service apt-cacher restart
  6. Öppna nu en webbläsare och gå till http://server:3142 (med ”server” menas serverns IP eller hostname). Obs! Är serverns paket av äldre modell så kanske inte denna adress fungerar och du får istället använda dig av: http://server:3142/apt-cacher eller http://server/apt-cacher
  7. Högst upp på sidan står nu hur du kan gå tillväga gör att lägga till denna cache på din dator, så vi går vidare till detta.

Klienten

  1. Skapa och redigera filen /etc/apt/apt.conf.d/01proxy
    sudo nano /etc/apt/apt.conf.d/01proxy
    eller
    sudo gedit /etc/apt/apt.conf.d/01proxy
  2. Lägg till denna raden för att sedan spara och stänga: (”server” är återigen serverns IP eller hostname)
    Acquire::http::Proxy "http://server:3142";
  3. Kör sedan en uppdatering av paketlistor – förhoppningsvis fungerar allt som det ska:
    sudo apt-get update
  4. Klart! Ifall det nu är uppgradera Ubuntu du vill göra så kör du:
    sudo do-release-upgrade -d (för uppgradering i terminal, till exempel för servrar)
    eller
    sudo upgrade-manager -d (för grafisk uppgradering)

Vill du sedan inte använda servern som cache längre så tar du helt enkelt bort filen /etc/apt/apt.conf.d/01proxy
 

Referenser

0: Ubuntu 16.04 LTS Xenial Xerus is released!
1: Release Notes
2: 16 Things To Do After Installing Ubuntu 16.04 LTS
3: Ubuntu 16.04 LTS New Features
4: Ubuntu 16.04 LTS (Xenial Xerus) Available For Download, See What`s New
5: https://help.ubuntu.com/community/Apt-Cacher-Server
För mer om apt-cacher: https://help.ubuntu.com/community/Apt-Cacher-Server

Kommentarer är stängda

Byt ut Ubuntus inloggningsljud mot Sam Hulicks egenkomponerade.

Ubuntu 14.04 LTS Trusty Tahr står för dörren. Jag kör den ny på min nya laptop (Sony Vaio Pro 13) och det är onekligen en go utgåva med en del nytt. Vad som inte är lika nytt är Ubuntus inloggningsljud, vilket inte har blivit ersatt på många, många år.
I september förra året (2013) gick spelet Mass Effects kompositör, Sam Hulick, ut med att han var en Ubuntu-användare och gärna stod till tjänst, ideellt, med att skapa nya ljud till Ubuntu. Det uppstod en kontakt med gänget på Canonical och Sam fick bland annat med en ringsignal i Ubuntu Touch (”Sam’s Song”). Sedan blev det tyst.
Nu har dock Sam släppt ett nytt inloggningsljud, icke-officiellt dock, vilket låter gött och är enkelt att installera.

Originalskriptet för installation finns här. Dock gjorde jag några få modifikationer och mitt installationsskript kan laddas ner här.
Det gamla skriptet flyttade filerna, mitt kopierar, samt spelar upp ljudet när installationen är färdig. Installationen är enkel och du behöver bara extrahera filen och köra install-skriptet. Läs README vid problem.
Ljudet är dessutom licensierat under Creative Commons BY-SA 4.0 – och är alltså komponerat och producerat av Sam Hulick.

Kommentarer är stängda

Problem med Penumbra Series i senare Ubuntu?

Jag och god vän bestämde oss för att avsluta Penumbra serien med Requiem som avslut – något vi har försökt oss på tidigare vid flertalet gånger, men det har alltid varit något som sabbat det: drivers, bluetooth, glömda kablar, ingen storskärm osv.
Nu gav jag mig fan på att gå igång det och då jag har ett diskret grafikkort i min dator så skapade det lite extra rynkor i pannan.
Jag fick detta felmeddelande: ./penumbra.bin: error while loading shared libraries: libfltk.so.1.1
Efter lite sökande så löste jag det (jag tror iallafall att det var detta som löst det) genom att installera nvidia-cg-toolkit:i386 och nvidia-cg-dev:i386. Jag kör alltså ett 64-bitsystem och troligtvis var det 32-bitsbibliotek som saknades.
Se även till att köra wrappers-filerna och inte de som slutar med ”.bin”.

Kommentarer är stängda

Music App update – Sep 25th.

And so we have less then a month to go before Music 1.0 should(/will) be released.
Oh, and there is a lot that’s happening!

Changelog

  • Mediascanner (Victor Thompson)

  • Arguments (Daniel Holm)

  • Reorder items (Andrew Hayzen)

  • Move from Dialogs to Sheets (Daniel Holm)

    • Settings

    • Add to playlist

  • Empty states when there is no music on device (Andrew Hayzen)

  • Updates to Playlist database to support new meta data. (Victor Thompson)

  • Added genres. (Victor Thompson)

  • Some code clean up.

Bugs fixed:

  • Width issues with items in the new sheets.

  • Only one track will be removed from a playlist, if it contains more then one with the same title. (Daniel Holm)

  • Toolbar missing in Playlists tab. (Daniel Holm)

  • Removal of a lot of error output. (Daniel Holm)

  • DB access errors. (Victor Thompson)

  • Music not supporting URLs. (Daniel Holm)

  • Reorder not working as it should in playlist. (Andrew Hayzen)

Mediascanner
We don’t longer scan your music collection ourselves. Instead we depend on mediascanner which is a new system service that keeps your music library up to date, and searchable using Dash. Victor worked really hard on making this come true.
Arguments
Click on a track from Unity and Music will play it. Also added a debug argument that will be used to show more output as well as a reset button for all settings and playlists. Used while developing.
Genres
Together with the new UI/UX and mediscanner service, Victor submitted patches upstream to add support for genres, which are now shown in first tab of Music. Press Rock and there will be rock, and only, roll.
Reorder
Since there is no support for drag and drop in Ubuntu SDK, Andrew worked hard on bringing us support for that together with the swipe-to-delete. Now you can press-and-hold a track in, e.g., the queue and move it up or down.

The Future

So, as I was saying we have until the 17th October to finish Music and release 1.0. We had three large changes to do:

1. Use Mediascanner – which is now DONE.

2. Integrate the new UI/UX – INPROGRESS.

3. Make it play music, even when the screen is off – TODO.

So we will keep up with landing new design changes – it will be beautiful! – and we have just started to talk about how to work with the powered system so that we can keep playing music when screen off/app not focused.

As always, I am optimistic: we will get there. Music is already in the daily images, together with the mediascanner. Give it a go, since we will do a lot of polishing the upcoming weeks: report bugs, thank you.

2 kommentarer

Music App update – Sep 8th. 100th rev and v 0.6!

Happy 100th revision! For me this is truly a milestone. I mean, 100 revisions since Music was just a basic UI concept. Now look at it. It plays music, sorts tracks by artist, album, has playlist support, shows cover art, seeks and starts to look pretty darn good.

We celebrate by giving you Music 0.6!


Changelog:

  • HUD support (Daniel Holm)

  • New app icon (Sam Hewitt)

  • New album view (Victor Thompson)

  • New artist view (Victor Thompson)

  • New first page with last played and genres (Victor Thompson)

  • New Add to playlist page (Daniel Holm)

  • Playlists now shows number of tracks (Daniel Holm)

  • Currently played track is highlighted all over the app. (Andrew Hayzen)

  • Animation when jump to next track. (Andrew Hayzen)

  • Clicking on a track bring the user to the queue. (Victor Thompson)

  • Merged together Queue with Now Playing, which has become the central part of the app (Andrew Hayzen)

  • Swipe to delete (Andrew Hayzen)

  • Adding apparmor manifest for when running confined. (Sergio Schvezov)

  • Updated Autopilot to (Victor Thompson):

    • Test Next song.

    • Test Use Oggs.


Bugs fixed:

  • Fix when adding item to queue from album page that album data does not
    appear in the play queue. (Andrew Hayzen)

  • Playlist Null property (Andrew Hayzen)

  • Play Queue cache (Andrew Hayzen)

  • Add to queue album page (Andrew Hayzen)

  • Fix location of added music content (Victor Thompson)

  • Debian fix common folder (Andrew Hayzen)


New Queue - Now Playing

Victor has made a lot of progress with integrating the new Mediascanner (which will be system wide in Ubuntu) into Music. Packages for using it – together with Grilo QML bindings – are landing in the Core Apps PPA. This is one of the most heavy (important) things that will have to be done by the time of 1.0 release.

The UI/UX is undergoing a real facelift to look like Lisette Ledgers design: http://design.canonical.com/2013/08/music-app-focus-on-the-content/

The focus is on the content with the Queue now playing a central role. The new design are coming a long nicely with both large and small fixes coming in continuously.

The main theme of the discussion me, Victor and Andrew right now is the Toolbar and the expanded listitems, which will make a lot of change.

We are also awaiting the API to make the app stay awake (keep playing music) after screen off.

So there you have it. The changes to and the release of Music 0.6.

There’s still a lot that needs to be done for 1.0 in October, but we’ll get there.

Kommentarer är stängda

Quiz App Update, 24th aug.

Hi all,
Back from a lot of work and studying for an exam. Back to my app submissions to the Ubuntu App Showdown.
The Quiz app, which I’ve written about earlier, is coming along nicely. Yesterday and today, I’ve been working on rebuilding some of the backend. Previously Quiz was only able to add a question, with an answer, and then list all of the questions, and if you wanted to answer a question you had to write it down. Then I added four buttons, one which contained the correct answer – no need to type it yourself.
Now, I removed those old buttons, updated the tables for the questions database so that you can add alternatives to your question, and each of them (max four, min two) gets an old button automagically since I’ve rebuild the backend to use ListModels instead of manually doing it. Each alternative is saved in an array, foreach.append to ListModel = done!
Result is found in the images above. I just need to deactivate all of the buttons when one alternative is pressed, instead of just the one that got pressed. Also the alternatives will be in a random order later on.
Later on I will create a way for the app to download new questions from a server, and also bundle the app with some inital questions. Untill then you have to add your own.

Kommentarer är stängda

First Ubuntu App Showdown submission: Quiz

Quiz is a quiz game, simply. But not really as simple as a simple quiz game.The idea is quite large, which actually makes me wounder if I should just make it simple now, and to make it bigger later on.

The idea is that you can use Quiz for two main reasons:

1. To learn: You can add any kind of question you like, and then use it to learn my answering your own questions. I’m currently reading a book about pretty much everything, and I add thinks like years, scientists, definitions and elements.

2. Game: Challenge your friends either by your own quiz, or by already submitted. That brings be to the much bigger thing: infrastructure. I will have to write a web back-end for users to authenticate and submit questions – and most importantly: make it safe.

So this first update is just to bring you up to speed: You can add your own questions, and you can answer them.

Next step will be to add a function do add alternative answers and returning these as buttons for the users, instead of a text field, which will have to be answered exactly.

Kommentarer är stängda

Music App update – July 15th.

It’s been a while since the last update, but there haven’t been any real news or updates – until now(!).

Today there where a lot that got merged into trunk, and therefore is coming to a PPA near you.


Changelog

  • Removed the ability to chose your own music directory. Instead using default: ~/Music (Victor Thompson)

  • For Ubuntu Hackfest, make Music scan ~/Music on each start up. (Victor Thompson)

  • Placeholder for cover art in Now Playing toolbar. (Victor Thompson)

  • Initial playlist support. (Daniel Holm)

    • Create/edit/remove playlist.

    • Add track to playlist.

    • Show playlists in Playlist tab.

  • Popover. (Daniel Holm)

    • Press and hold playlist to either edit or remove it.

    • Press and hold track to add to playlist or queue it.

  • Debug (Daniel Holm)

    • New function that’s makes it easy to shut debugging of for later.

  • Library. (Andrew Hayzen)

    • A limit has been introduced into the buffer to stop large memory allocations.

    • Performance tweaks so database is written in a single transaction.

  • Ability to seek on the Now Playing view. (Andrew Hayzen)

  • New icons. (Lucas Romero Di Benedetto)

    • Default album/cover art missing.

    • Last.fm

    • Playlist

    • Music Directory


Bugs resolved

  • Buttons in queue dialog being too far down.

  • Playlist dialog not showing up.


Hackfest

Last week Ubuntu Hackfest started off and day two treated the Music app.

I (Daniel) worked on the playlist support, which landed in trunk today. Although you aren’t yet able to actually play, or show any of the tracks in them, they work.

Andrew Hayzen helped a lot with the scanning of the music dir. He first proposed a branch that shortened the scanning process a LOT! Then he helped trying to resolve the UI lockup during scanning by introducing limit to the buffer.


Design meetings

During one of the past design meetings we decided to pretty much put the UI on hold, since we haven’t yet decided how the app will look like, exactly. However, we still do some change, like icons and annoying bugs, but there will be no large changes and I hope you all can bare with us until the UI is decided – and Lisette Slegers and Lucas have some really good ideas coming our way: It will be gorgeous!


Whats next?

Well, quite much.

  • Victor and I will take a look on how to switch from the current tracklist playing, to the chosen playlist.

  • I will move the remove the queue dialog and move the queue list to the Playlist tab.

  • I will continue to work on scrobble support, which is not yet done – and together with that, we will get a new way of downloading and using missing cover art.

  • Some nice new icons will land by Lucas.

  • Micah Losli is working on the bug that when shuffling is activated, wrong track info is showing for the currently playing track.

  • Probably much more, which I don’t yet know of.

Kommentarer är stängda

How to create a simple web app for Ubuntu Touch.

DEPRECATED – It is now far easier to create a web app using the Ubuntu SDK.

So I’ve started to create some really simple applications for Ubuntu Touch by using already existing web pages that are optimized for touch devices and smart phones, and then open them in the default web browser, but as separate windows.

This guide will go through creating a simple launcher and package it for your device.

What you need before we start is a working development and package environment, so read this:

  • Some knowledge of the terminal.

  • If you later want to upload to Launchpad for a PPA, read and follow this:

    • http://developer.ubuntu.com/packaging/html/getting-set-up.html

  • You then also need a PPA, of course. I’m using ppa:danielholm/touch-apps for this.

We are going to use a simple desktop file that launches and points a URL that Ubuntu Touch’s

browser opens as it’s own application. You get one of your favorite web sites as an app and you get HUD support for free.

Then we add the package stuff, and download an icon to use; build and then done!

And if you also upload your app to a PPA, others will enjoy it as well.

Later, I will stop using Debian packages for these kind of apps, since I figure that the new Click packages is being developed just to be used for applications like these.

Alright, so let’s get going. I’m going to use Wikipedia as an example for this.

If you already know the URL of the mobile adapted web site, use that.

For example, Wikipedia has: http://m.wikipedia.com

1. Download the archive, which contains a template and packaging files: http://ubuntuone.com/4cP0vdGTMd8LsWjru4cTya
If you already know that you don’t want to create a package and upload to an PPA, use the .desktop template: http://ubuntuone.com/2EeECluBvimv1KkcDCDoQv

2. Edit wikipedia.desktop and change the values of ”Name”, ”Icon”, and the URL in ”Command”.
Name: The one that will show in Unity. I’ll use “Wikipedia”
Icon: Path of the icon you want to use.
Command: Replace only the URL. The browser handles the rest.

3. Save it, and change the filename to your new app’s name. I’ll use wikipedia.desktop
(be sure that this file is executable! (chmod +x))

4. Open the Debian directory and open postinst. This file will be run after initial install of the package files, and will here be used to download the icon that will be used. I’m using it this way so that I can redistribute the launcher without any copyright infringement. You simple take the URL of an icon/image you want to use, and replace the one in the file. Then change the filename that the downloaded file is saved as, as well as the app directory. I’ll use the Wikipedia icon from Play Store: https://lh6.ggpht.com/-Eq7SGa8CVtZCQPXmnux59sebPPU04j1gak4ppkMVboUMQ_ucceGCHrC1wtqfqyByg=w78-h78

5. Each of these files has to be edited (in debian/). Replace all Wikipedia stuff with your own app name and info.

  • changelog

  • control

  • copyright

  • install

6. When all the files [that needs to] has been edited, it’s time to imitate some version control in your working dir, using bzr:

$ bzr init

7. Then add the files in the dir:

$ bzr add

8. Lastly create a commit with a appropriate message:

$ bzr commit -m ”Initial commit.”

9. Time to get building! In your working dir, run:

$ bzr builddeb -S

This creates the needed files to upload and create packages in the PPA, which we’ll upload:
(this is to my PPA. You have to use your own)

dput ppa:danielholm/touch-apps wikipedia_0.1_source.changes

10. After a while you package will be ready to apt-get (after you’ve added your PPA, of course).

Enjoy your app, and to please share it.

I set up a recipe to build my packages automagically (yes, magic) every night – if there is a change – in launchpad. If you use this, you don’t have to upload your own packages, and you just need to upload your code to Launchpad.

Since my apps aren’t from anywhere else, I removed the upstream version in my recipe, and replaced it with my own version number, in this case “0.1”. There’s probably a better way of doing that, but I leave that for others to resolve.

Kommentarer är stängda